Week 4 - 3D Printing and Scanning
This week we went over a number of different factors that go into 3D printing. There are certain design rules that must be followed to prevent bad prints, performance characteristics to make note of due to the layered nature of the printed product, and a variety of material choices that each have their own benefits and drawbacks. We also discussed common file formats and slicing software before ending the lecture with 3D scanning of objects.
Assignments:- Test the design rules for our 3D printers as a group
- Design, document, and print an object that can't be made subtractively
- 3D scan an object
Testing Design Rules
In class we discussed a number of different structures that can be used to test how prints should be designed. For example, if a part is being made without supports there is only so far that the filament can go before it begins to sag. This limits the distance that prints can extend out over space. Other limitations involve the tolerances between parts that are meant to fit together, build angle without supports, and wall thickness. This work was conducted by various members of our section and details can be found on our CBA site here. The design files we used for the prints are found here as well. It is important to note that these tests can be kept in mind as a general rule of thumb, but the exact performance will depend on the filament type and the printer settings used to print the actual part. As such, for critical parts some of these rules may need to be repeated. Images of the design rule prints are seen on our CBA section site with details on the printers and slicers, but a few example pictures are also seen below.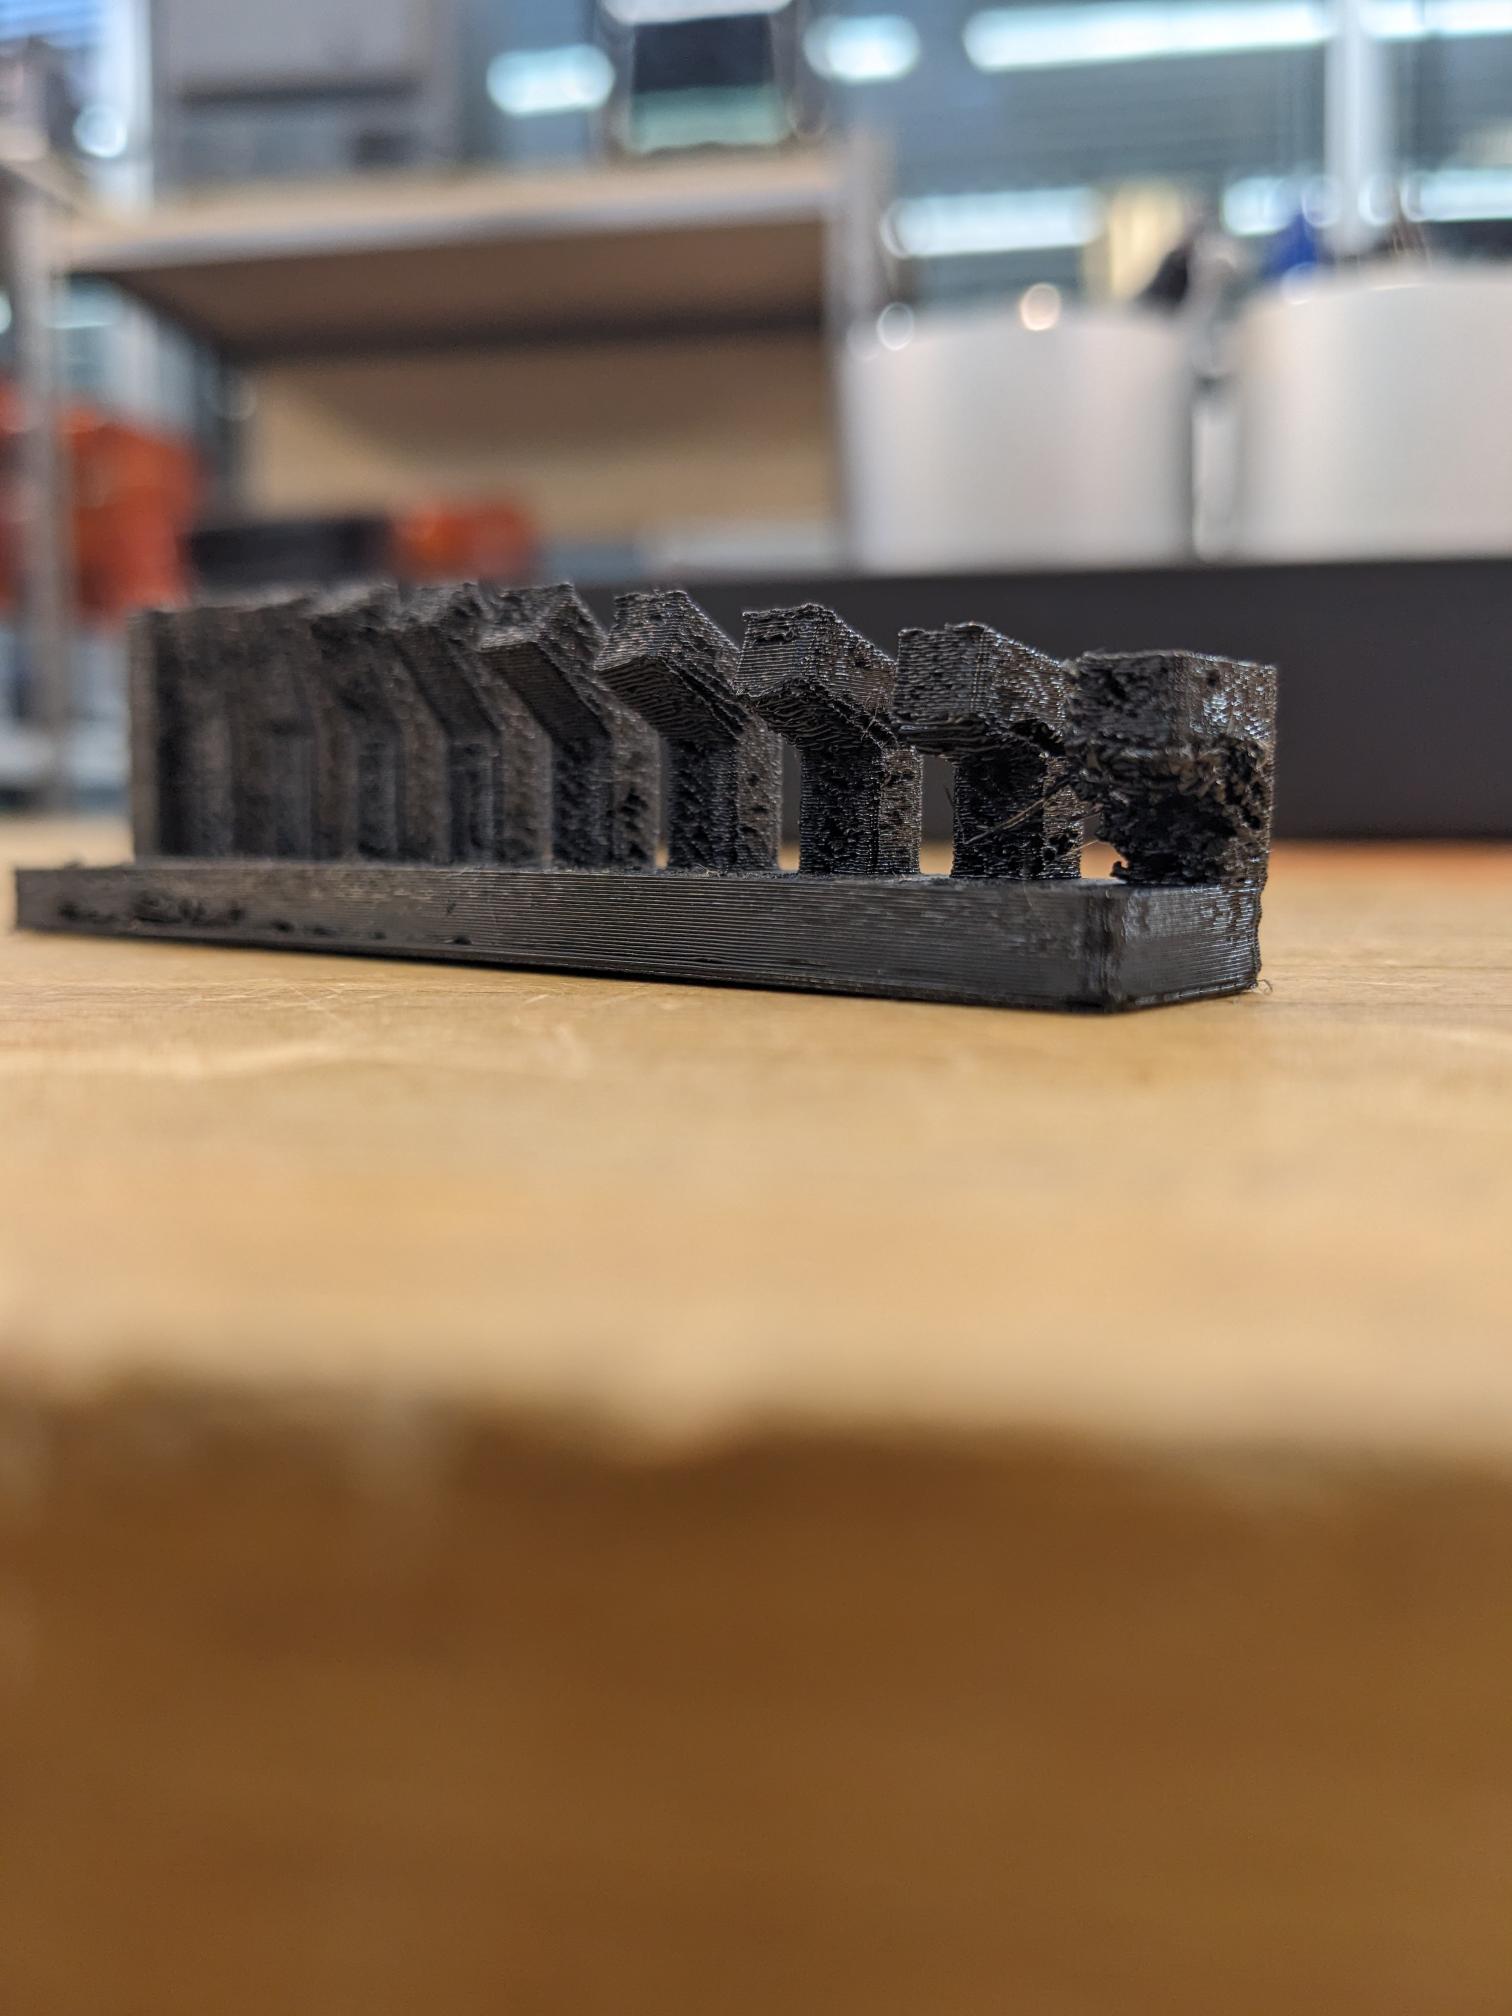
Designing and Printing a 3D Object
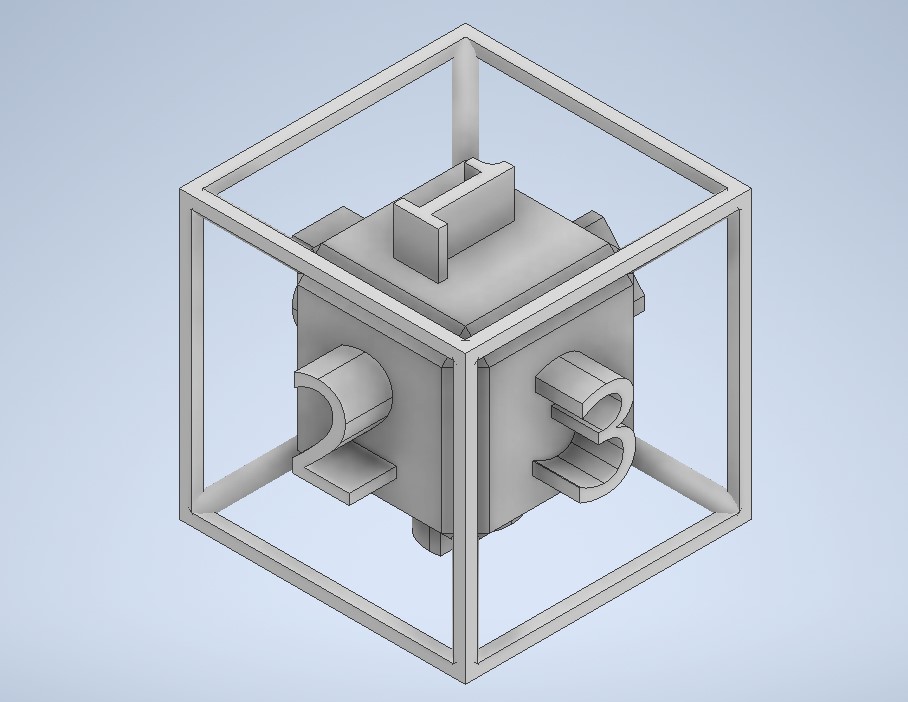
The wording of the assignment for 3D printing is that we should print something that cannot be made through subtractive manufacturing. It took me a moment to think of something that would be challenging for something like CNC to make, and I landed on the idea of making a tesseract like shape. I then realized I could take it a step further and make it into a die. I probably didn't do the CAD the best way possible due to the complexities of angled extrusions that would then meet an external frame, and now that I am writing this I may have been able to make it easier as an assembly as opposed to a single part, but the resulting part is as seen below.Most of the printers in the CBA show are Prusa printers, so I loaded the die into the Prusa slicer software and went through the same setup steps. I used the same filament type, PETG, and print settings to follow the design rules as much as possible. I enabled supports and sliced the part, which can also be seen below.

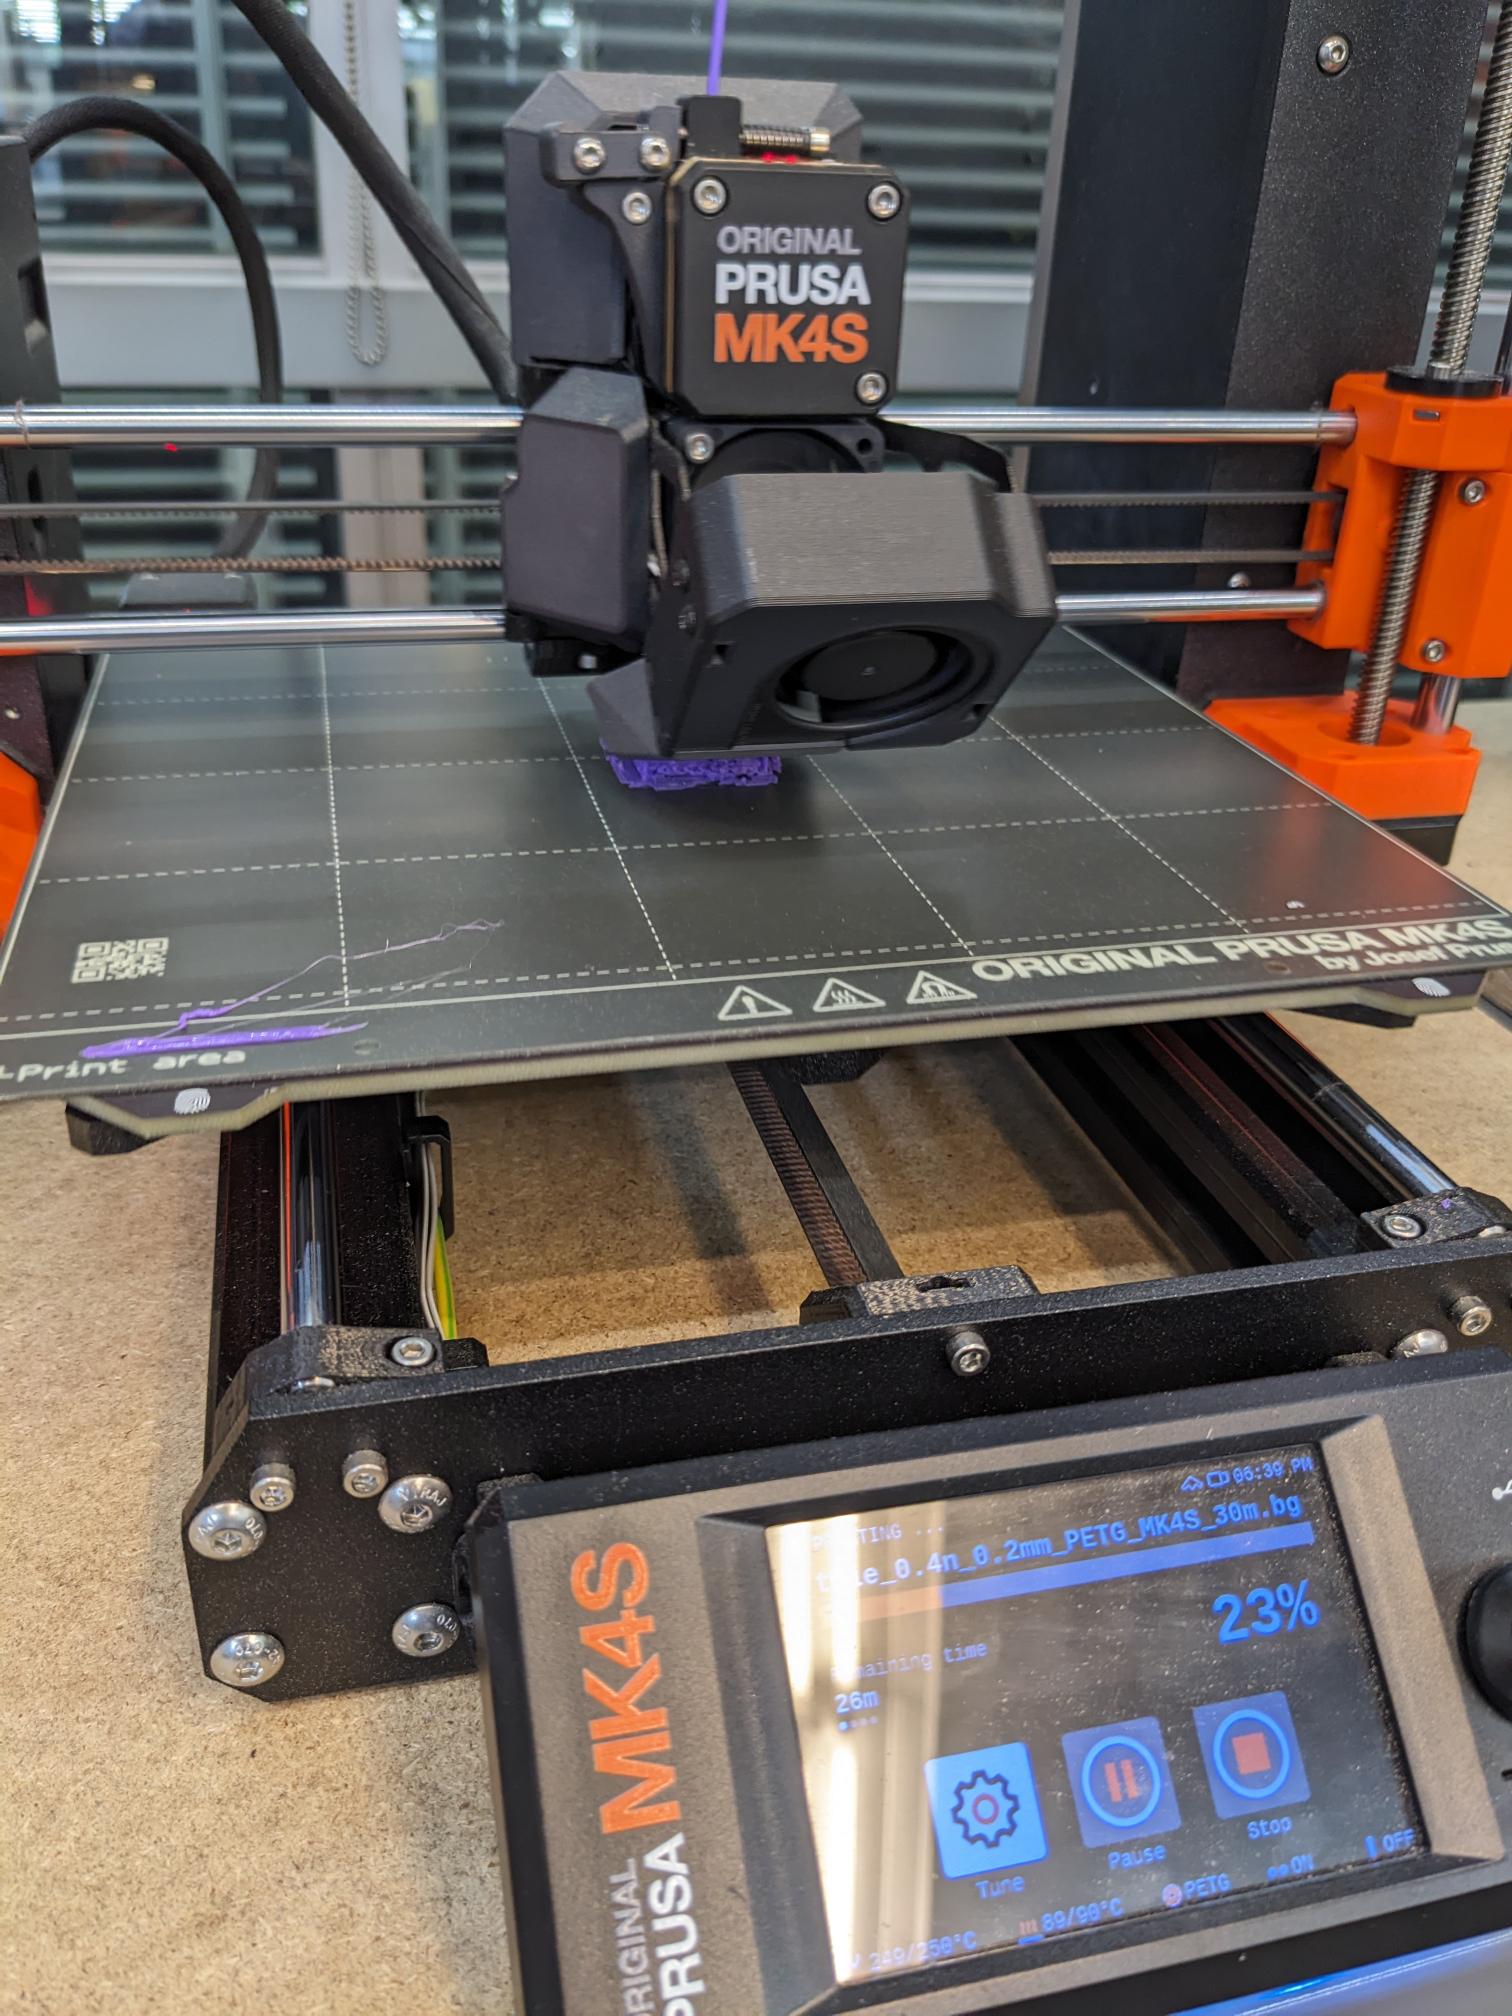
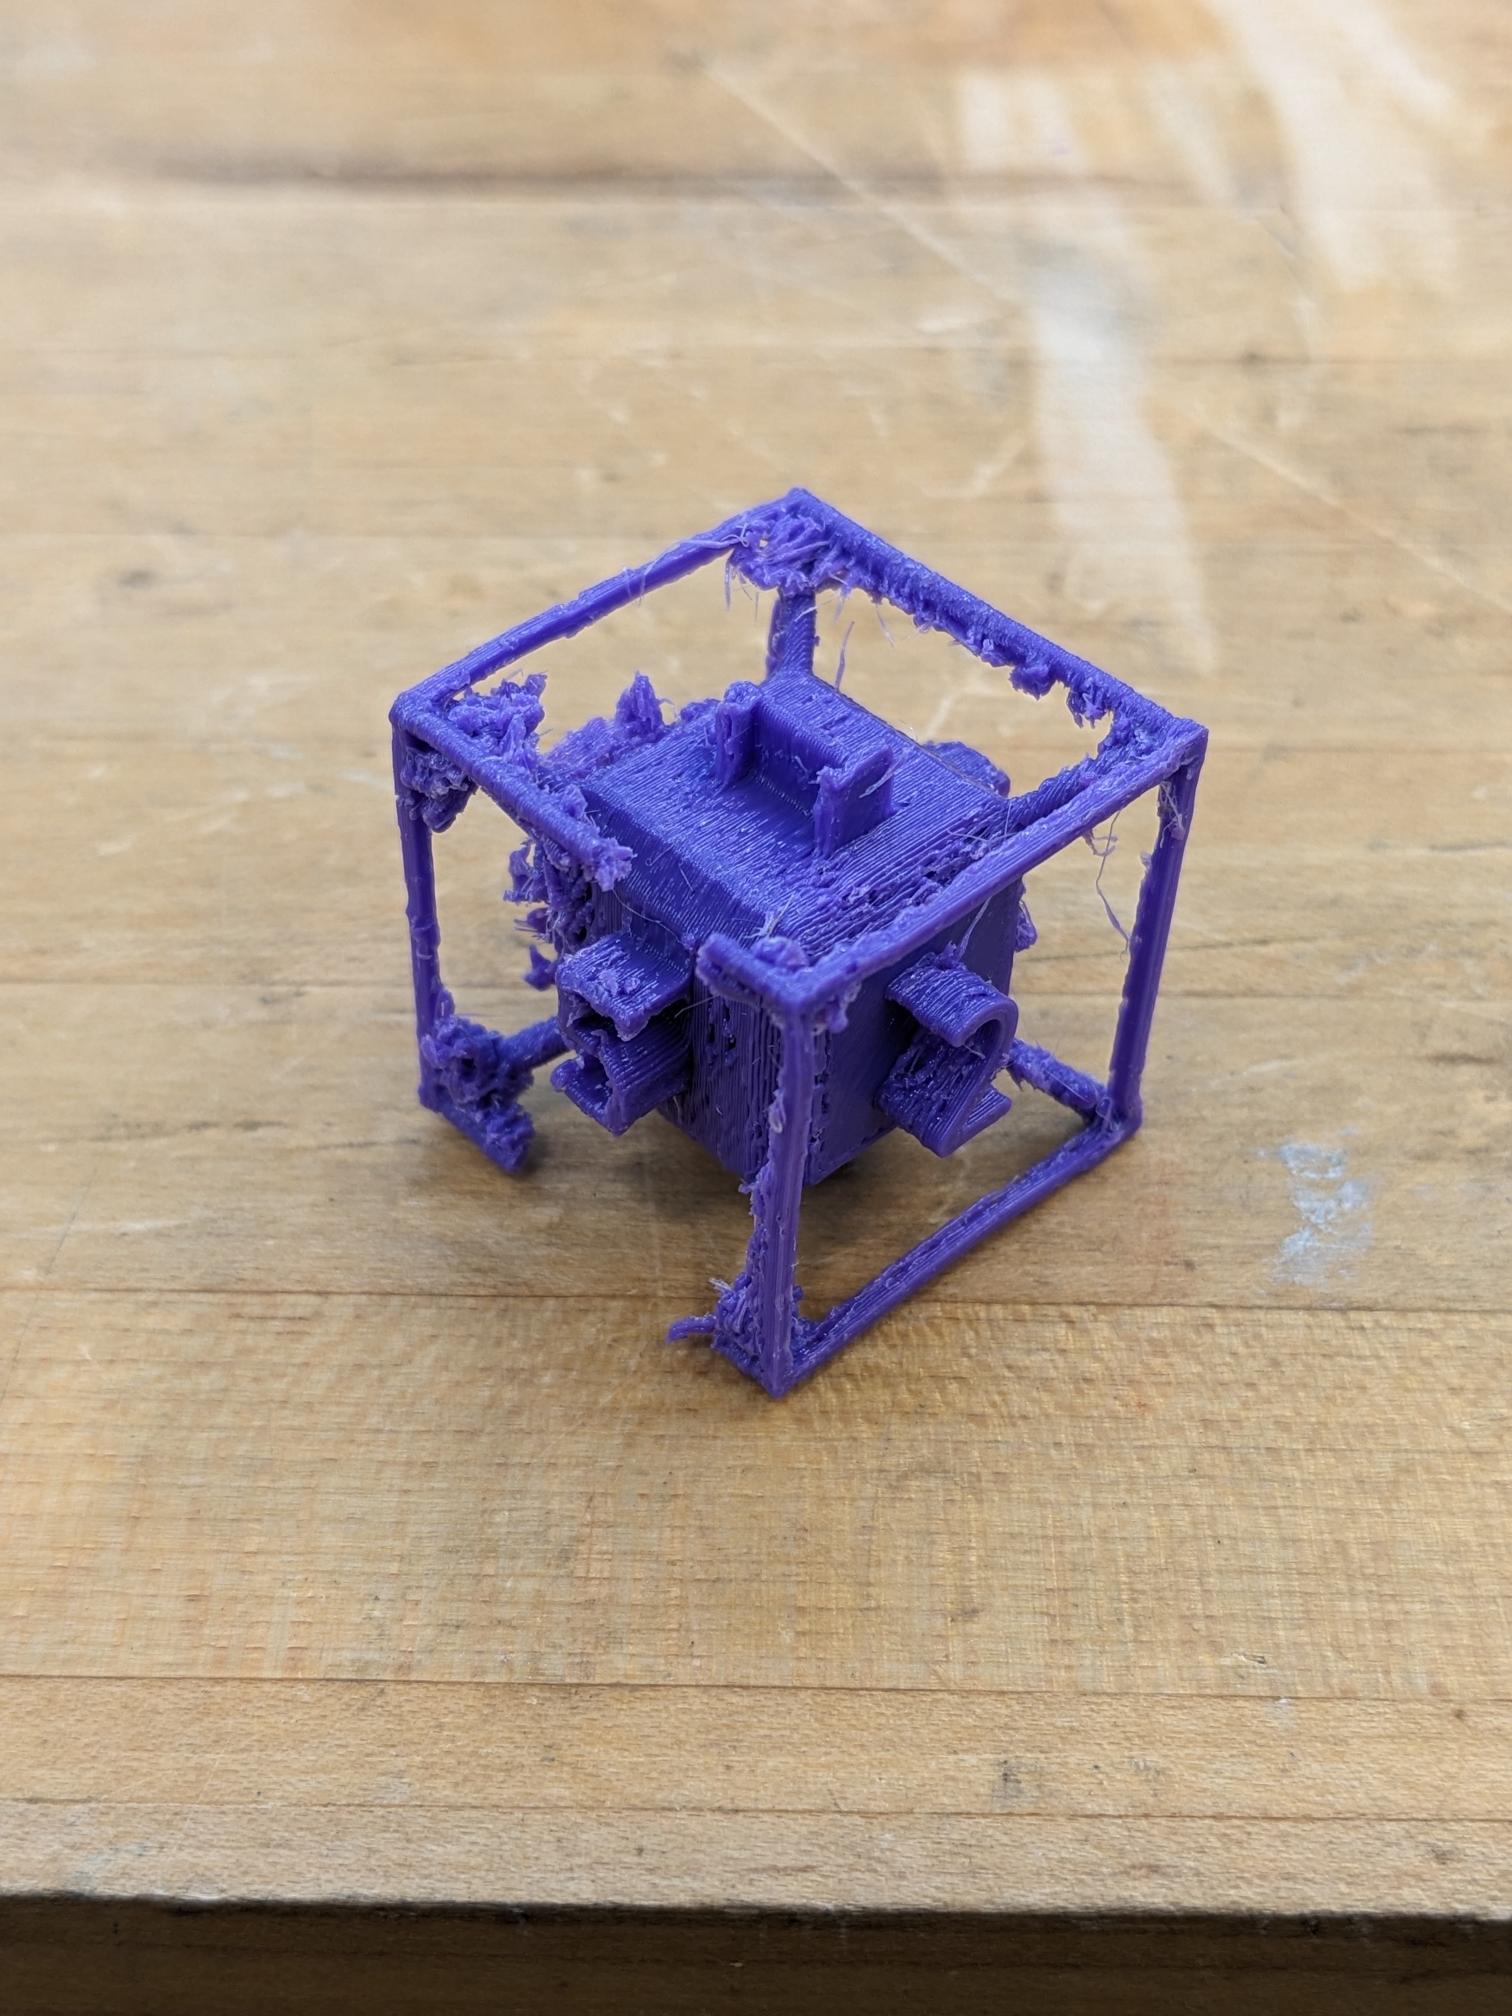
The print ultimately came out just okay. The supports were very difficult to remove, and the more of the supports I removed the easier it was to break the outer frame of the die. The print orientation also made quite a difference, with the bottom face of the die not printing very well at all, and any limbs of the outer frame that were printed in the vertical direction from the build plate tended to break much more easily. This is due to the fact that breaking these just had to separate the printed layers as opposed to breaking through a printed line. If I were to print this again, making the outer frame pieces larger would be very helpful. Whether that means scaling the entire part or just editing the outer frame, both would be viable options.
3D Scanning an Object
For scanning an object, we were introduced to a number of different techniques and tools that could be used to scan 3-dimensional objects. I don't know if there are scanners in the shops, but I decided that I would try one of the phone apps. I used Polycam, which uses pictures of the same item from as many angles as possible to stitch together a 3D object/mesh. I tried to target a little Eiffel Tower keychain that is on the order of maybe 25mm x 25mm x 40mm. I didn't know if this app is intended to scan object this small with fairly intricate details, but it actually did a pretty good job of picking up a lot of the surface texture of the beams. It did run into some challenges with the keychain part as a bit of weird geometry was picked up around the connections, and the app did include some of the surrounding surface that the tower was placed on as well. But overall, for a free account and an app that can be readily downloaded this was a pretty easy way to scan an object. Unfortunately to actually export and .stl file I would need to upgrade to a pro account.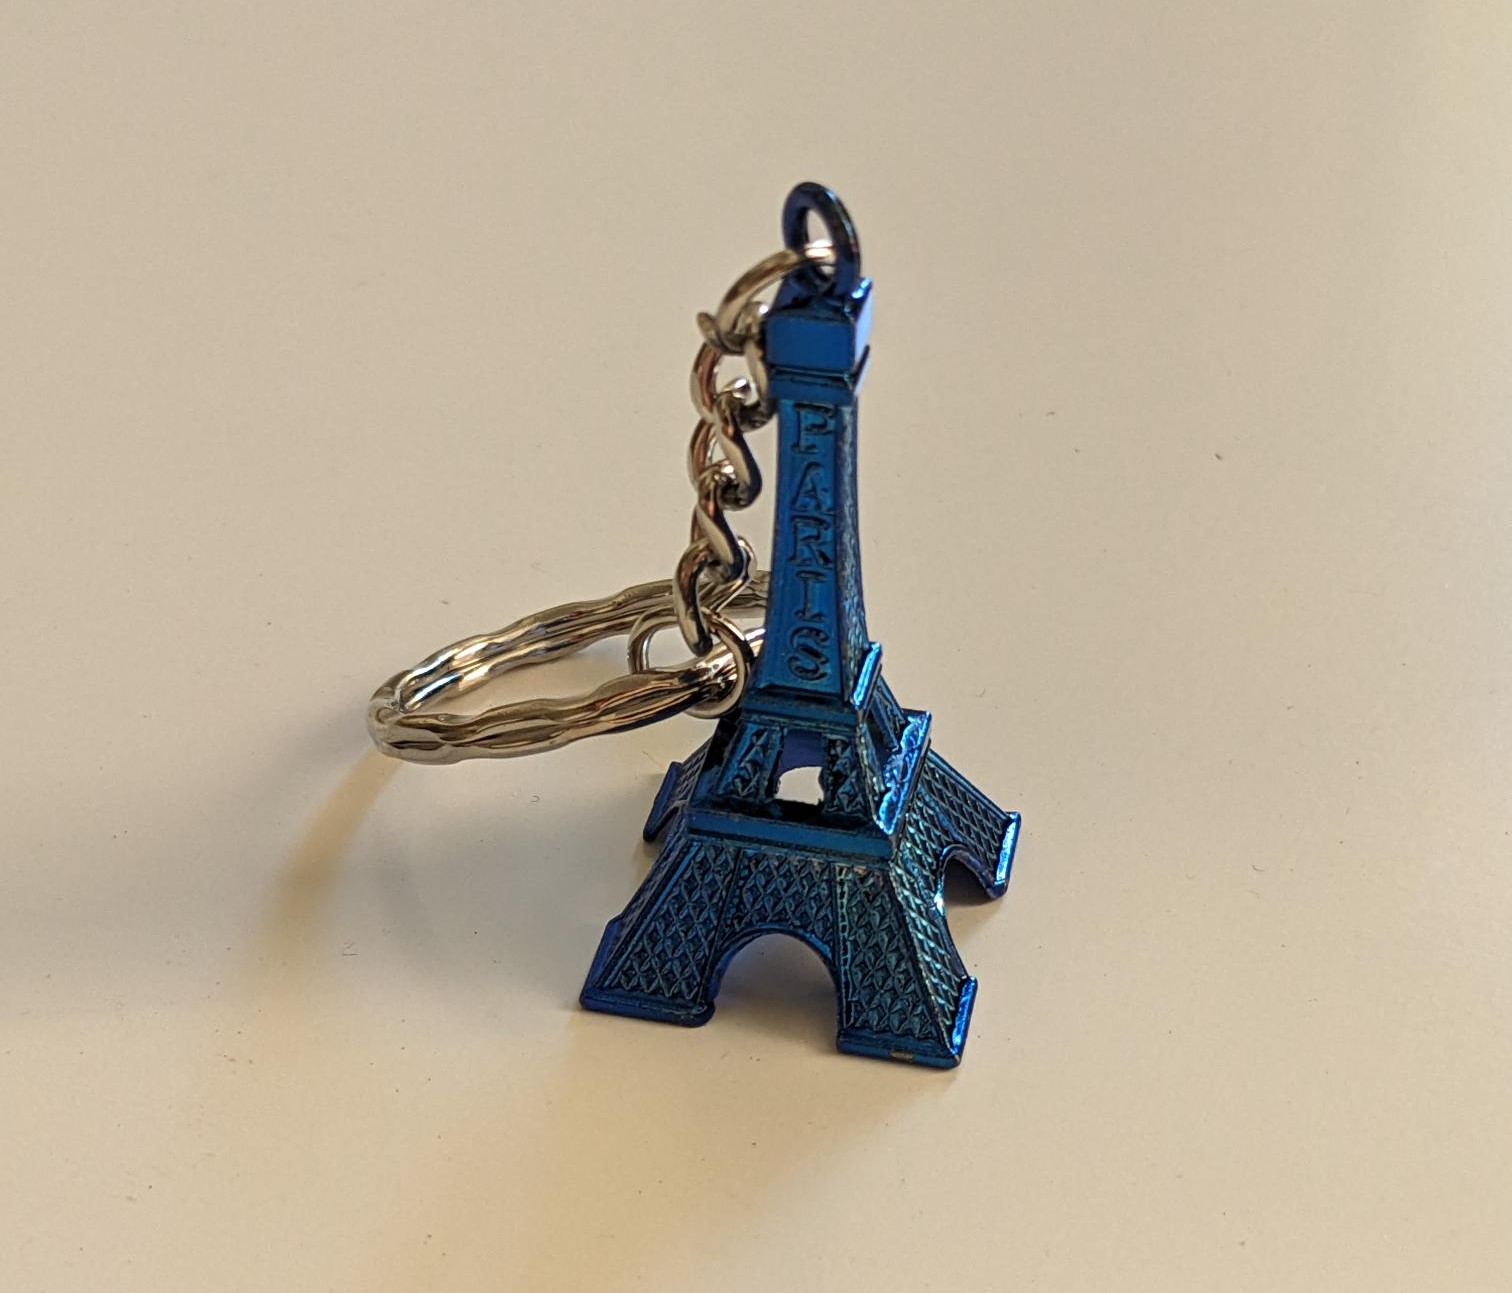
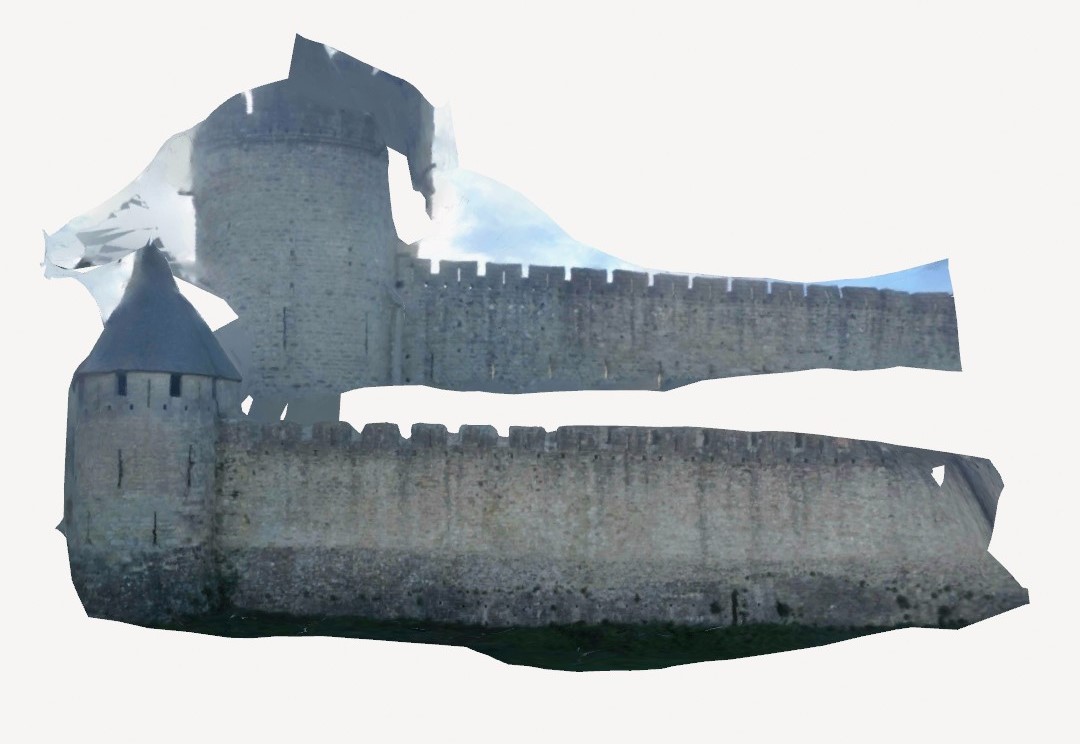
On a fun little side note, since the first object that I scanned was very small I thought about how the app would do if I tried to scan something massive. Unfortunately, the free account also has a limit on the total number of pictures that can be stitched together and I ended up running out of those very quickly. I tried to scan La Cite, a castle in Carcassonne, France, but I only got through a small section of the walls. I didn't have any images from the inside so I knew there would be no real 3D geometrical aspect to this, but the app still did a pretty good job combining the images and at least getting the depth approximately correct. At least the stitched image is more than what I could have captured in a single picture from my phone.