Mission
This week, write an application that interfaces a user with an input &/or output device that you made.
Note that I already completed this assignment during Networking Week. I made a simple web interface with a clickable button to turn the integrated LED on my board on and off. However, this week I wanted to make some progress towards my final project, so you can read about my next steps below.
Process
First I had to plan what it is that I want to make. For my final project, I plan to make a wearable COREXY. Therefore, I will have two stepper motors to control. As an intermediate step, it would make sense then to have an interface that can allow me to control how much a stepper motor will step. I considered two options for an interface:
- Processing Application
- Web Application
A processing application seemed like a good candidate because I know it interfaces well with the Arduino IDE. I could send commands from it fairly easily. However, I felt like a processing application means that to run it I must have the application downloaded to the device. As last week, I had my ESP32 set up as a server, it seemed like I should be able to make a web interface to access the device, which could then be accessed on any laptop or even a smartphone. Therefore, I decided on the Web Application.
I recently learned about a platform called Glitch, and decided to prototype in there first. What I like about it is you can rapidly code (even starting from a template) and your app can already be accessible on the web. I thought it would be cool to be able to control the direction of the drawing-head and whether it is up or down. Therefore, I coded an arrow keypad to control the drawing-head’s direction, and a button to toggle the drawing-head to be raised (OFF - not against the skin) or lowered (ON - against the skin). You can access the website here.
Here’s a little gif of it working using key-presses: 
Alright, but with that said, I realized that I had a classical set up for a website:
- index.html
- style.css
- script.js
Last week, when my ESP32 was server, I had it print out each line of CSS and HTML. This is terrible for web development, because typically you want to have the content, styling and logic mostly separated from each other.
Fortunately, I discovered that the ESP32 has a file system, and that you can indeed have such files and call them, rather than write each line into the .ino file. This is called the SPIFFS filesystem.
I found an Arduino ESP43 filesystem uploader plugin. I followed the direction to download it, create a tools directory under ~Documents/Arduino/ and throw it in. Therefore the plugin can be found at ~Documents/Arduino/tools/ESP32FS/tool/esp32fs.jar.
Then, I created a new Arduino project, and inside the project folder created a data directory. Inside the data directory, I created a test_example.txt file. Then I could access the plugin from my Arduino IDE at Tools > ESP32 Sketch Data Upload. Then upload a basic program that can print the contents of the .txt file to make sure the file system is working. Mine did! :)
Some things to note:
- Make sure that you set the board to accept a new program, and reset it too with the button!
- Also, make sure your serial monitor is closed, so that it doesn’t complain that the serial port is unavailable by being used. Then you should see a success message!

Great! Now the next steps will be to have my board serve the appropriate page, and write logic so when the interface is used, my stepper motors will move.
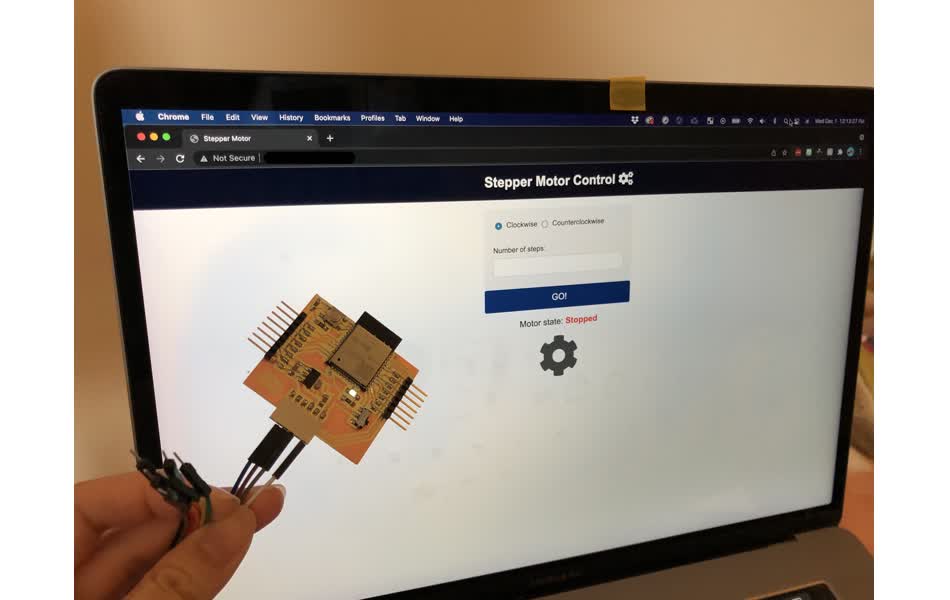
I realized it might be good to take a step back, and think about how to learn the logic of my stepper motors. Perhaps I need an interface that doesn’t necessarily take arrow keys as input, but rather just allow me to control how many steps a single motor takes. I found this wonderful example that shows how you can use websockets to have an interface to control a stepper motor from the page that is served by the ESP32. I followed this example to get to a page that could be served by my board. Along the way, I needed to get the following two libraries and include them as ZIP libraries in my Arduino IDE. Go to these pages, and click the CODE > Download ZIP to get them. I put the downloaded ZIP folders into a a Arduino/libraries directory on my computer.
- ESPAsyncWebServer (.zip folder)
- AsyncTCP (.zip folder)
To install the libraries, in the Arduino IDE, go to Sketch > Include Library > Add .ZIP Library.... I opened my sample code, and it worked!
As a next step, for the interface, I should expand it to control 2 stepper motors that will be connected to my board.