Embedded Programming
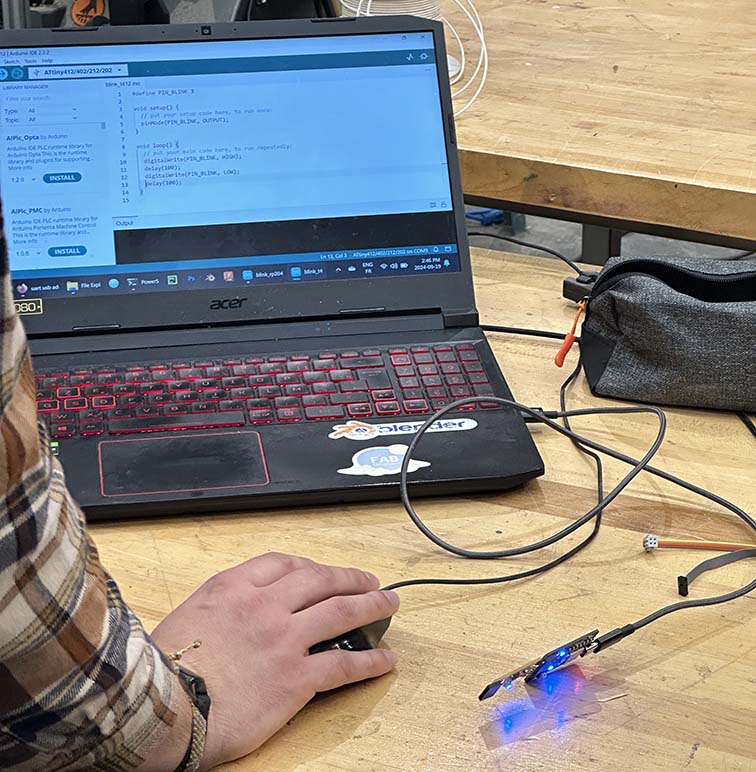 This week we need to simulate a circuit to show the integration of hardware and software prior to our circuits development and manufacturing weeks. To start with the group assignment, we learned about different microcontrollers, their architectures, pin structures, power/operating parametes, and available memory. Some chips that stood out to me were the RP2040 and SAMD21 for slightly slower but high throuput operations, and the ATTiny family for large distributed networks of microcontrollers or projects that require a few pins for simple tasks that need to be fast. Quentin also showed us a demo of his "touch piano" board that he made using a SAMD21. Since he used the chip directly (as opposed to integrating a breakoutboard for the chip such as a XIAO), he detailed the bootloading operation for the piano. To the left is the piano in the process of being bootloaded from the Arduino IDE.
The task I have settled on is mapping musical note inputs to servo actuation. This task can pretty easily be simulated in the online software Wokwi. The idea here is that servos will actuate in specific patterns that correspond to a saxophone pad structure. Notes will be typed on a keyboard within the range of C# 3 to G# 5. The range is the typical (concert pitch) range for an Eb Alto Saxophone. This is topical in terms of final project development, so let's get to it!
Below is the broad structure for the program. Quite simply, a user defined input of a note on a keypad is sent to a logic board that then determines which servos are affiliated with the note and actuate them accordingly.

The microcontroller chosen for this project is the Pi Pico which hosts an RP2040 chip. The RP2040 was chosen because this project, while not complicated, requires a lot of pins (several for the keypad and several for each servo). The 32-pin structure of the RP2040 makes it ideal. We discussed in the group assignment the various architectures, microcontrollers, and COTS breakout boards available to us. Many microcontrollers host a high throughput of pins, the RP2040 is not unique in this area; however, the integration of micropy (a microcontroller version of embedded python) will be useful down the line when interfacing with the eye tracking software needed for final project development. Front loading the development of this chip will make subsequent tasks a little bit easier. As the semester ramps up, I'm sure future Kyle will thank me. ~A note from future Kyle: this final project idea has been abandoned, so the thought was nice, past Kyle, but we didn't actually go this route.~
Additionally, for both the RP2040 chip as well as the Pi Pico controller, the datasheetds are works of art - very intuitive to navigate and easy to read. Kuddos to the developers! Below are some links for the data sheets that I read to familiarize myself with the Pi Pico and RP2040 - these are absolutely worth a read if you plan on doing anything with either of these chips/boards.
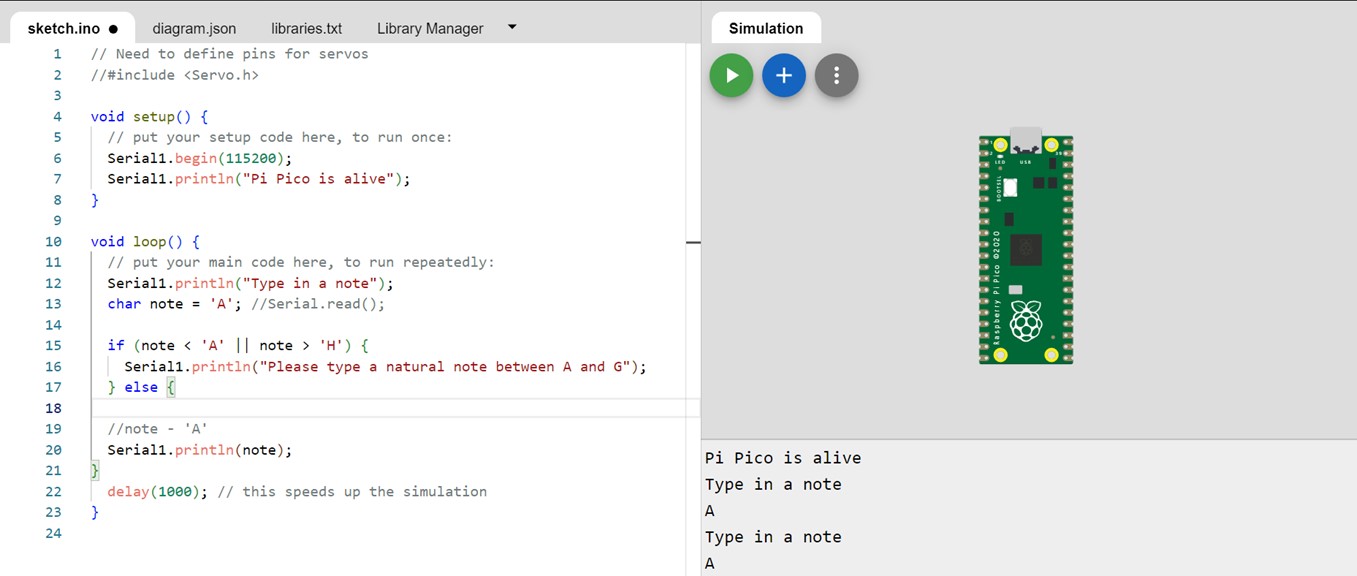
The first step of this work is the simplest form of determining I have a working input output situation. A hardcoded note (in this case, A) is defined as the character “note”. From this, when the pico is asked to print the value of note it returns “A”. Cool. Lets make this a bit more useful now.
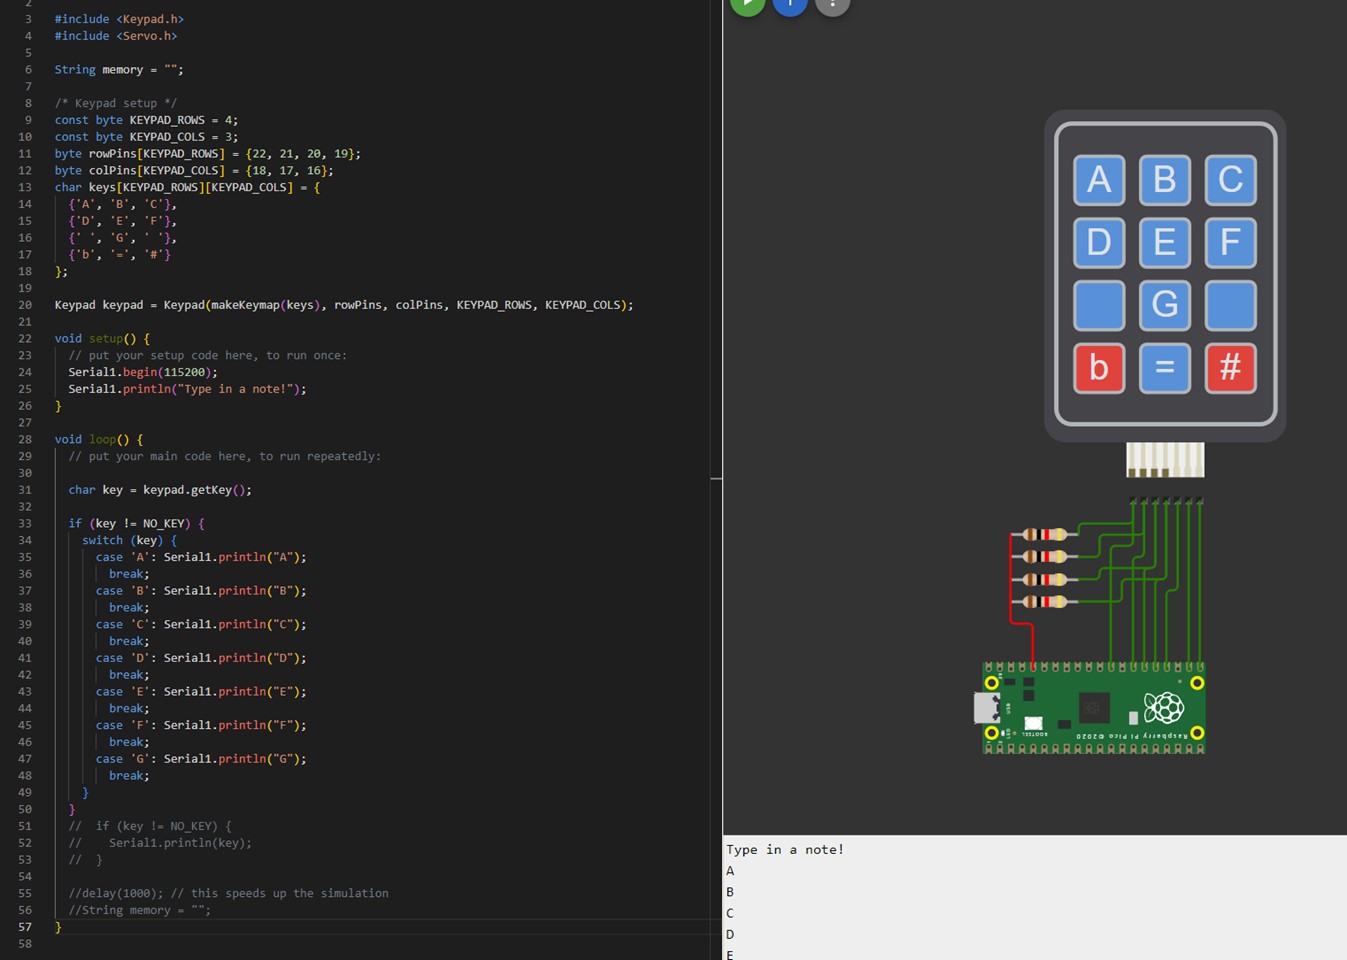
The next iteration involves a keypad. The keypad is wired to the pico board in pins 16-22 (input pins) with power being given to the keypad via the row pins. The keypad json attributes were changed to reflect the mapping I intend to have for musical notes (notes in the scale and the sharps and flats called out for accidentals, and the blank spaces used for octave jumps and the equals sign for sending the note). The current version of getting a working keypad has the keypad output being written to the serial monitor. This is nice, but eventually we need to have the board write the note only after the equals sign has been pushed so that accidentals and octaves can be commanded. For now, we will work with this setup and wire up the servos before adding more complexity.
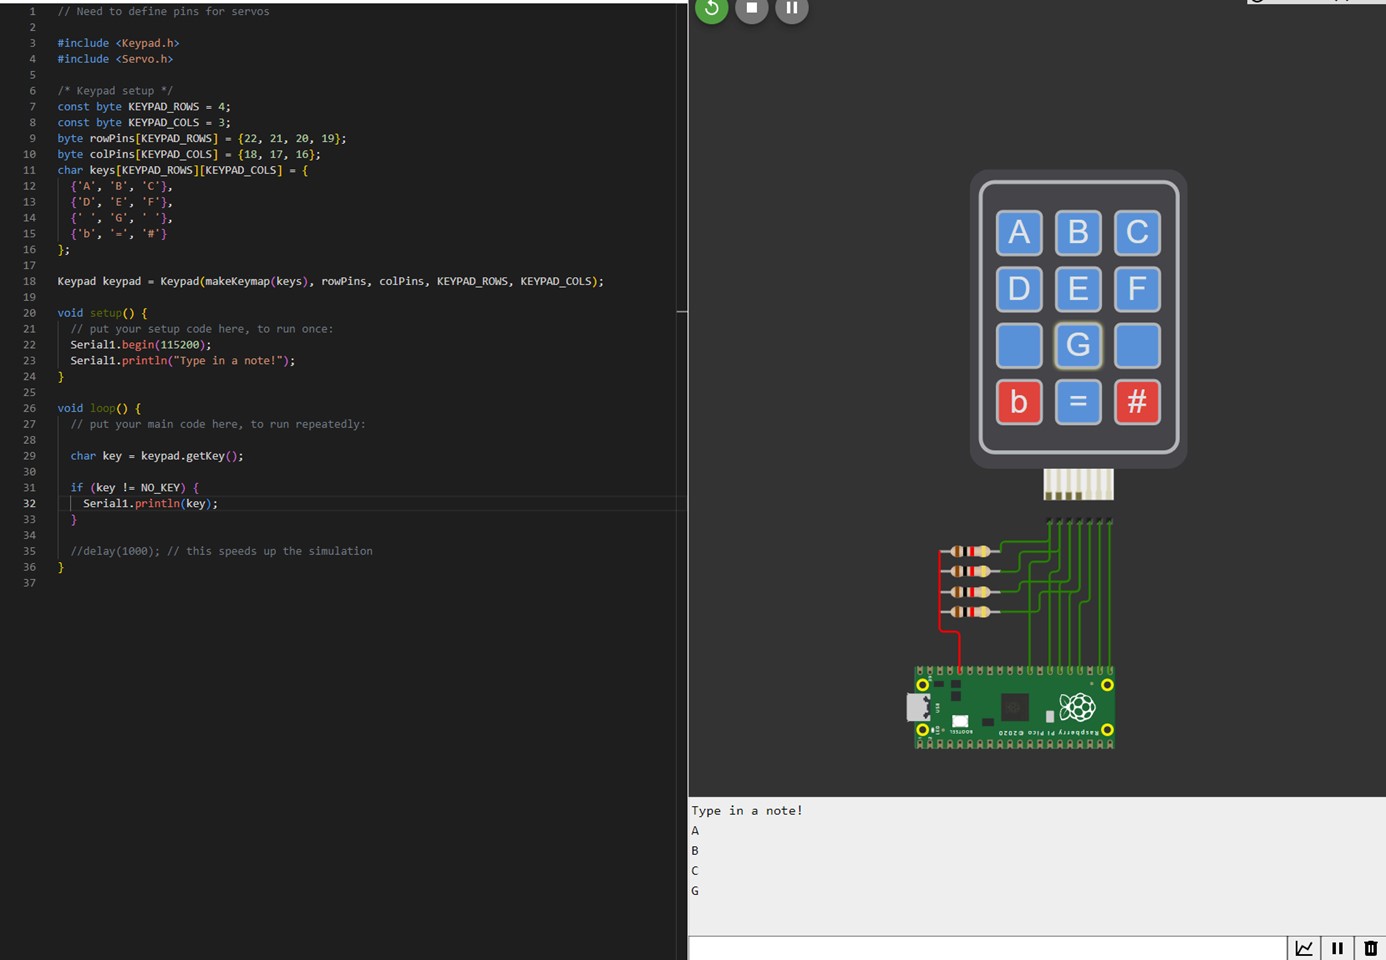
Thus far I have pulled from several examples on Wokwi to better understand the keyboard syntax and mapping as well as just the RP2430 syntax. This is all new work for me, I have little experience with it, so it is a slow process. Thanks to the keypad input example, calculator example, and pico keypad with LEDs examples, I am able to get my keypad up and running!
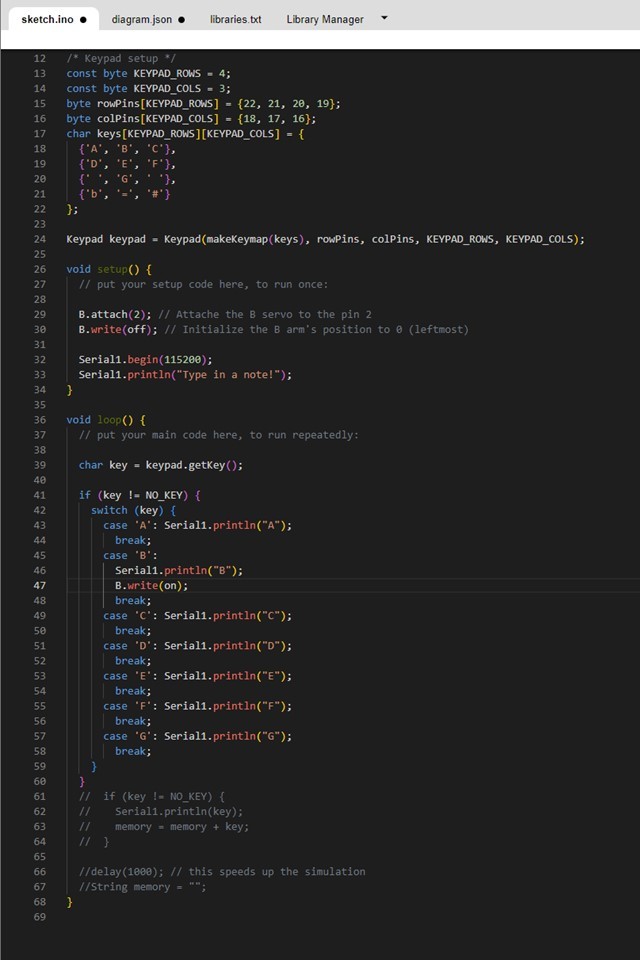
To actuate the appropriate servos, the notes need to be binned by the logic in a case structure. That case structure is rather simple and shown below. I identified the key inputs and then hardcoded a dedicated print message for that note as the case output, that way if I hit a note and the corresponding note prints to the serial monitor I know the logic successfully functioned.
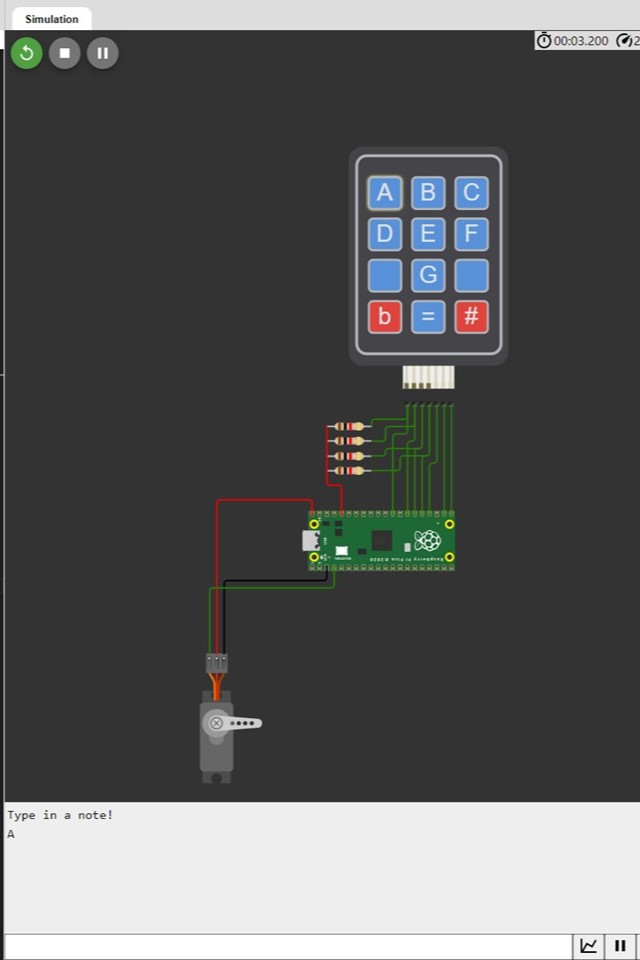
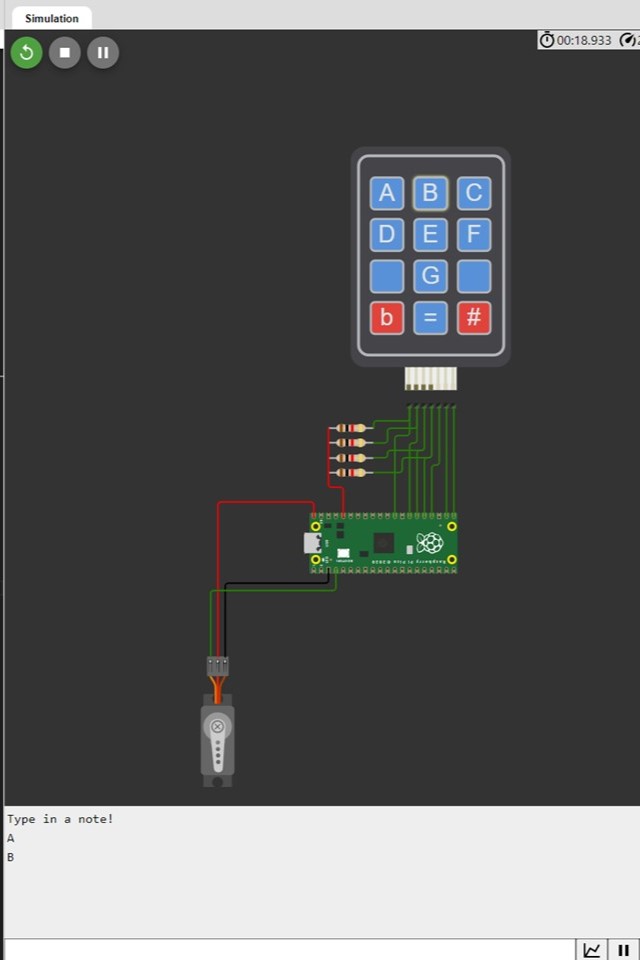
Here is a trial with the first attached servo. We can see the arm is unactuated when the keypad is pressed for the note A, but IS pressed for the note B. Huzzah!
Now it’s time to add the rest of the servos and map them accordingly.
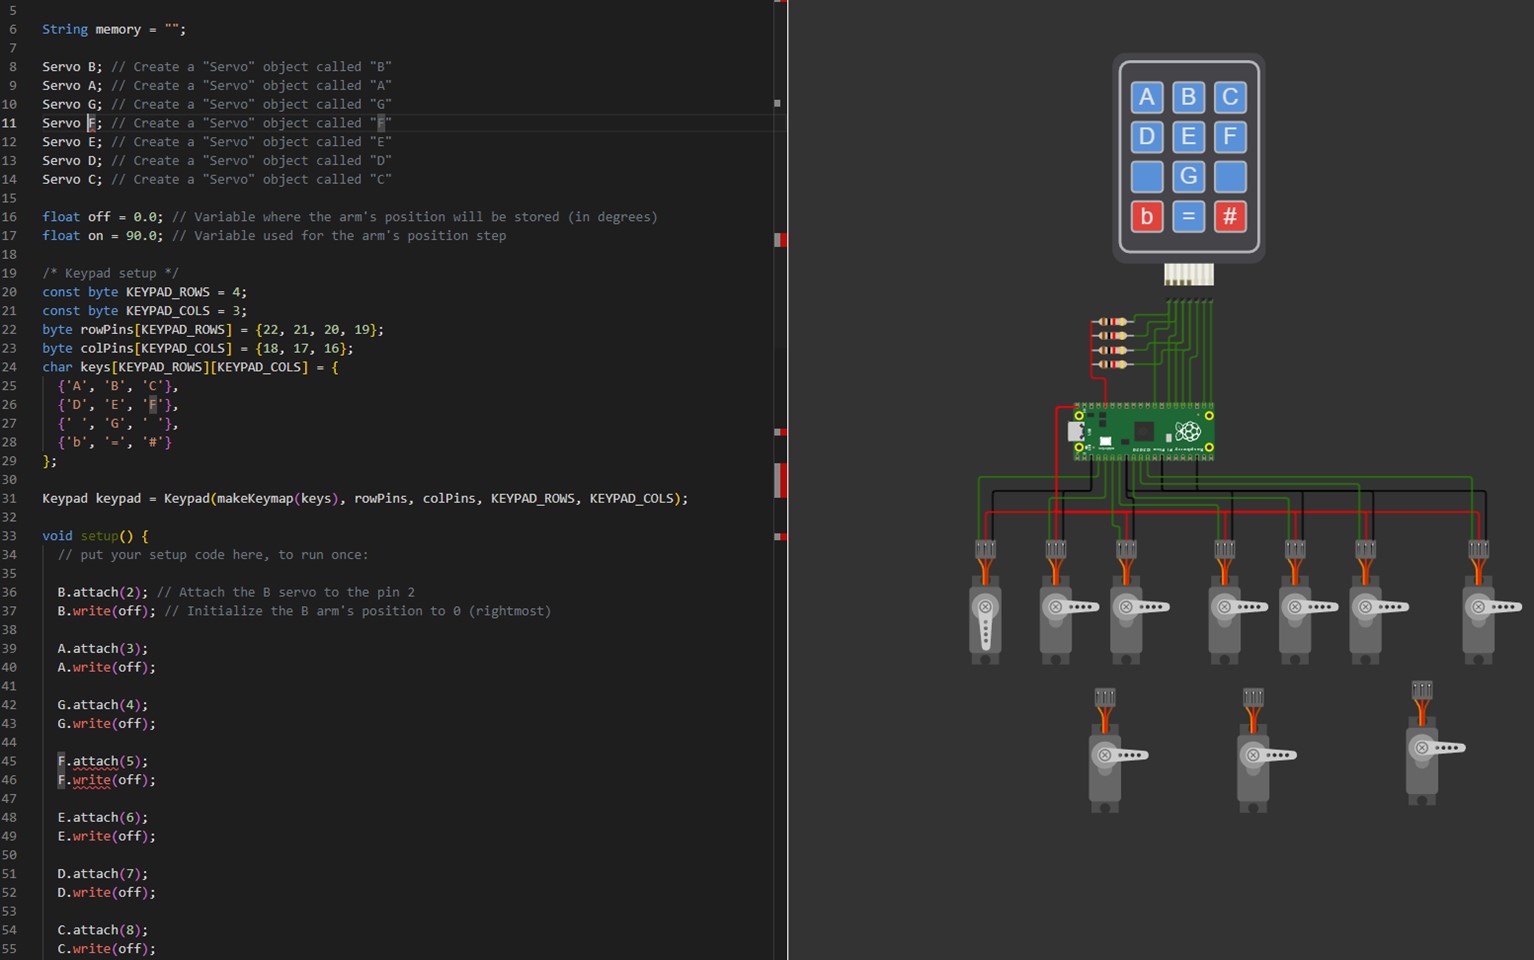
Here’s an interesting thing. So apparently F calls on the flash memory command, so my F servo won’t work being called F. Not a big issue but kills the vibe of my program a bit. Oh well. Let’s call it “nF” for “Note F” and move on (I am a little salty about this minor inconvenience).
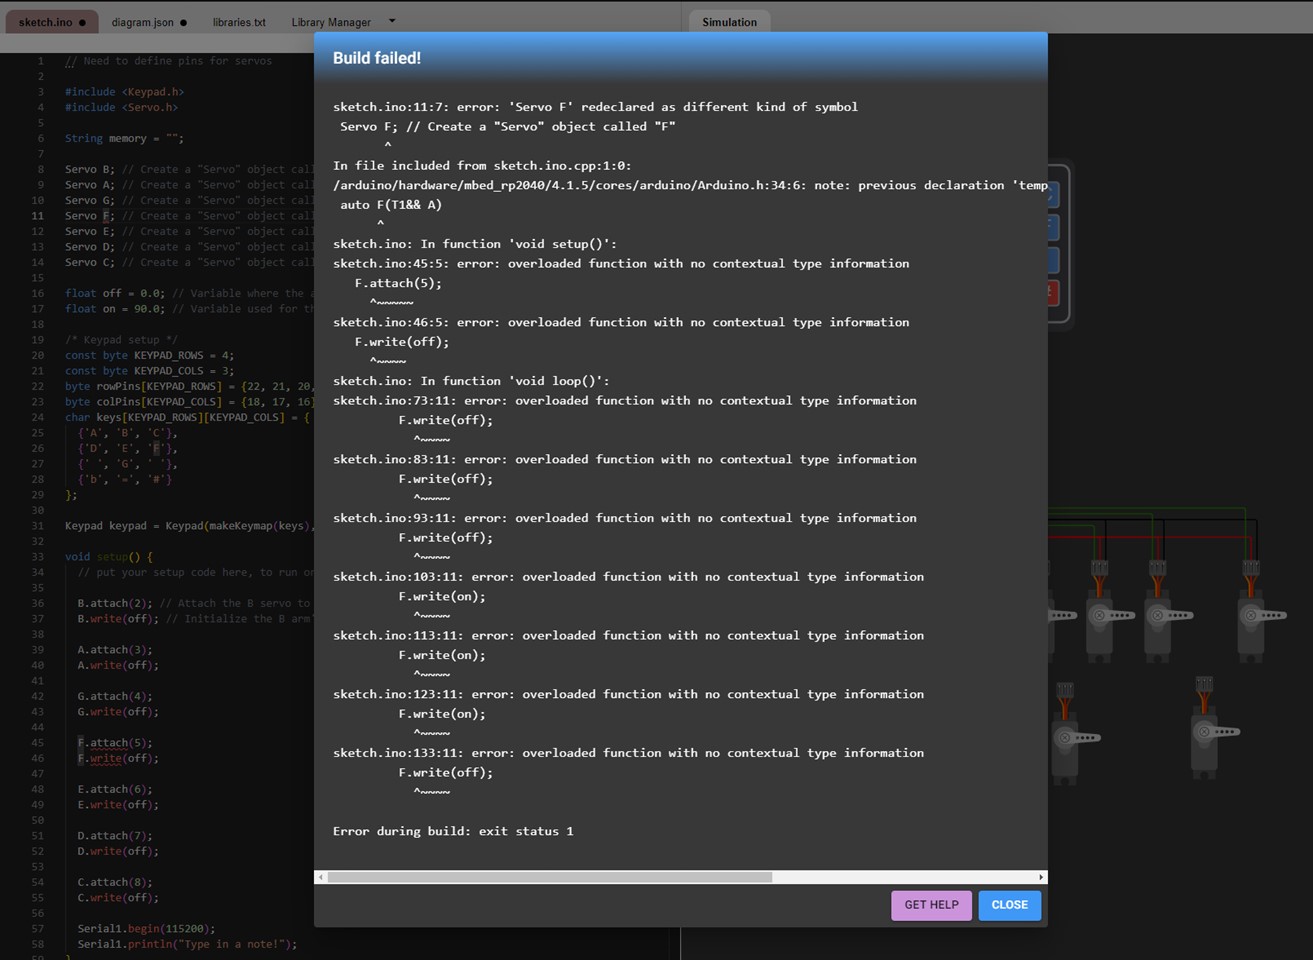
Lets try that again.
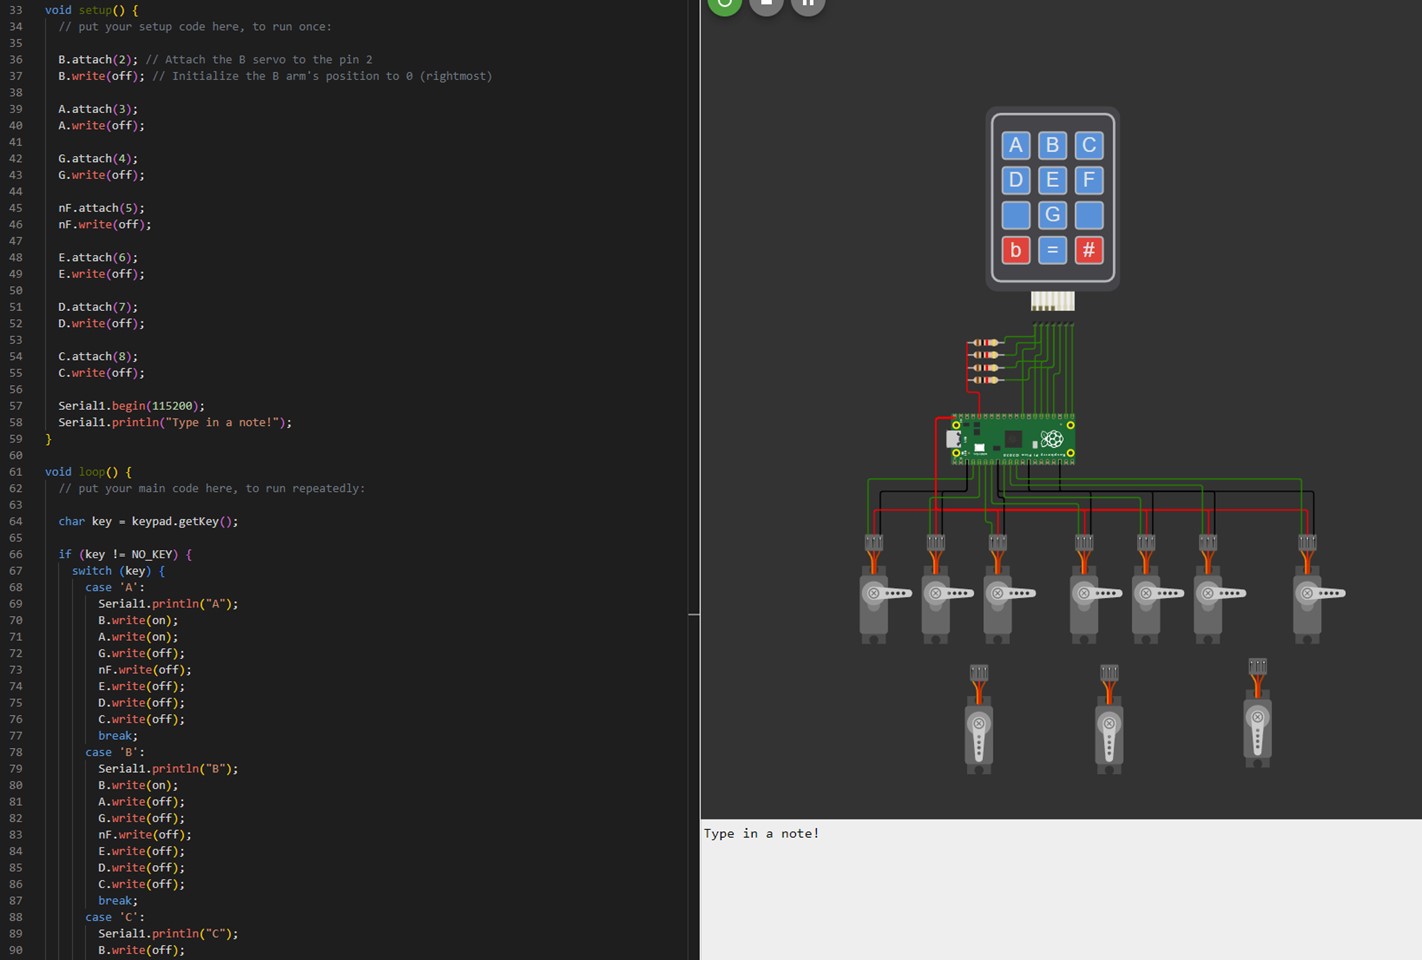
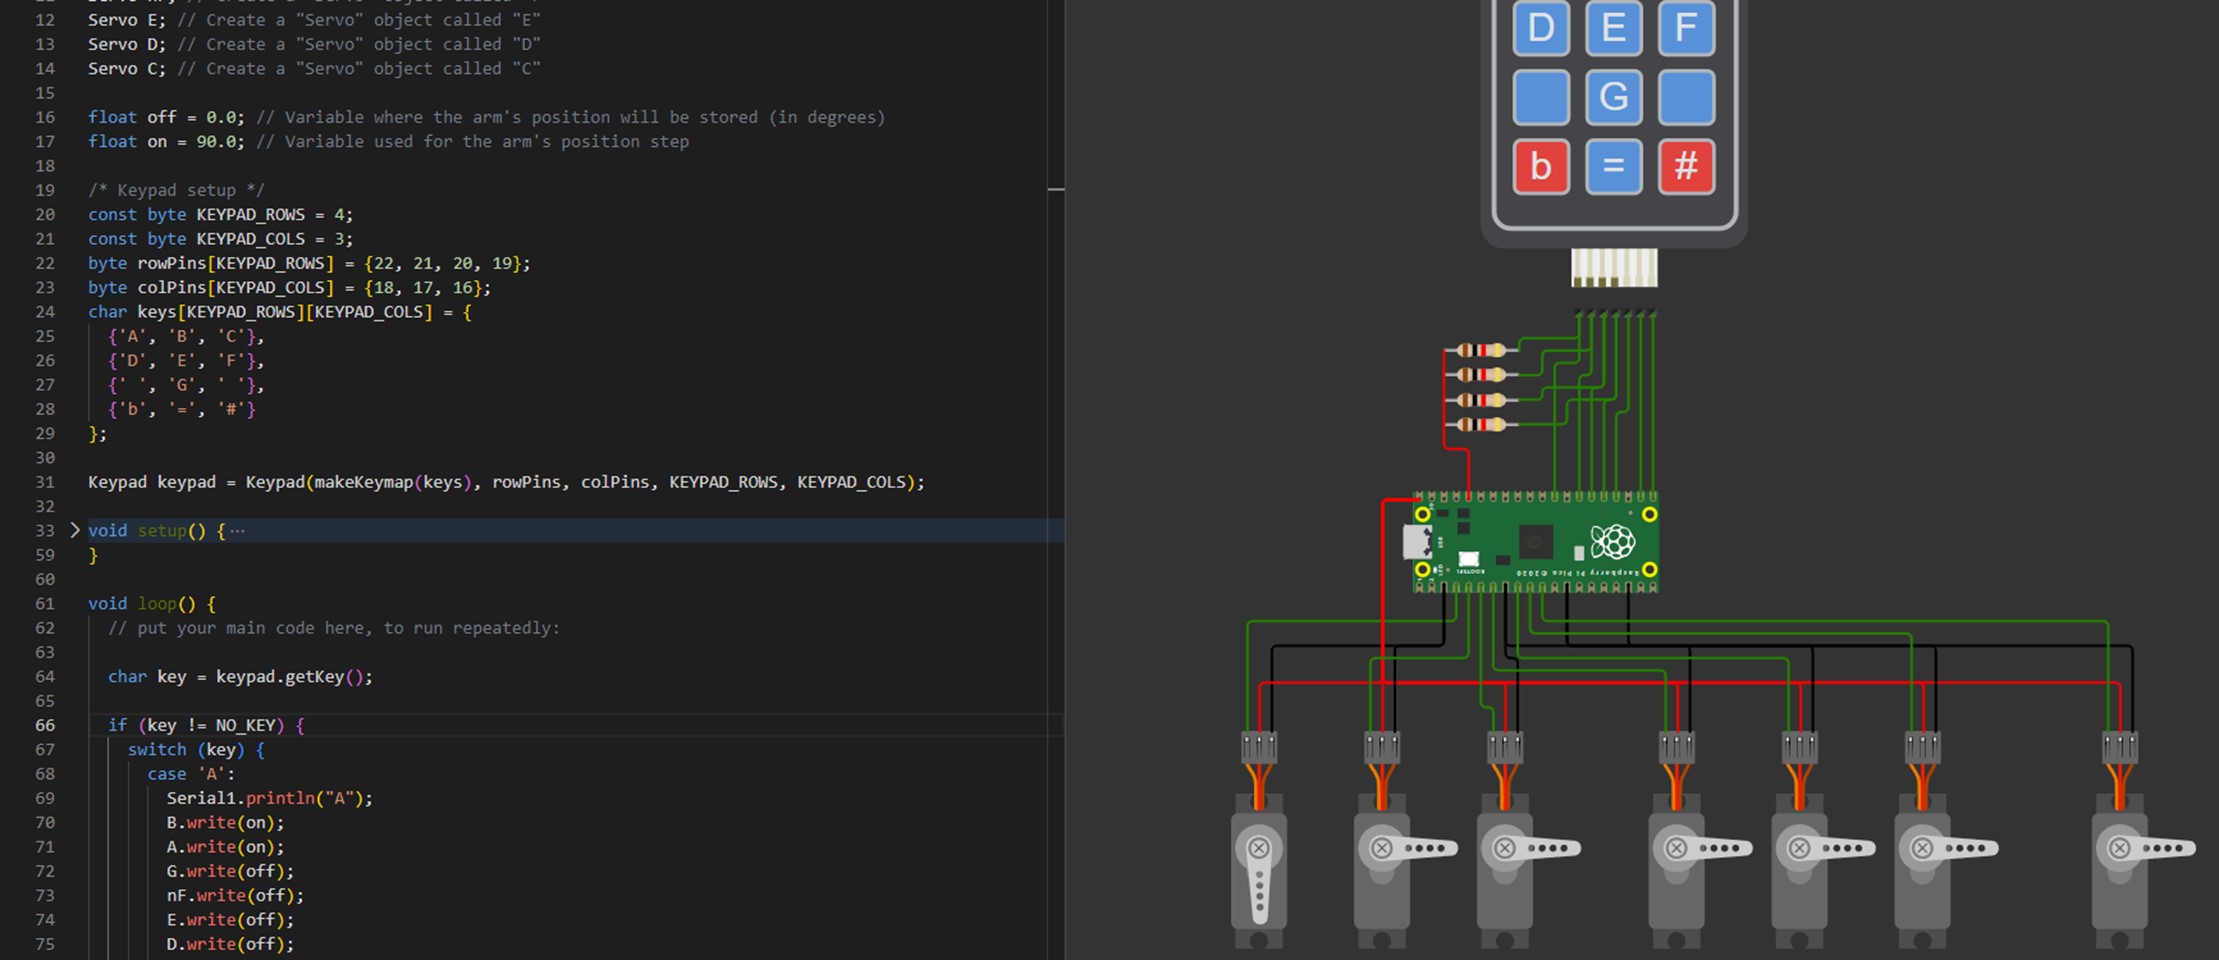
Yay! Let’s play some music. Below you can see the notes being actuated for an A followed by an E followed by a C. All working properly!
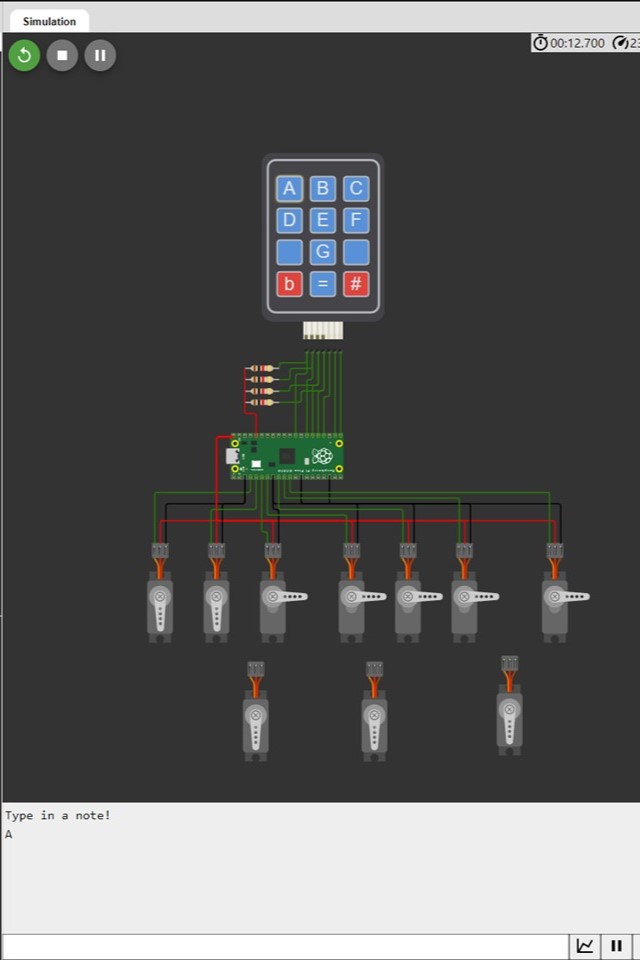
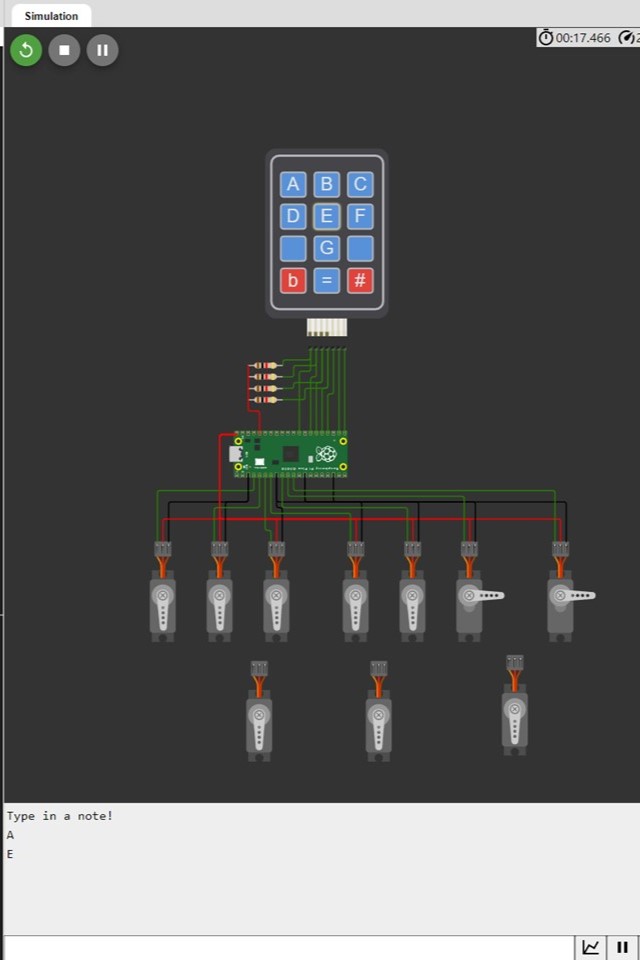
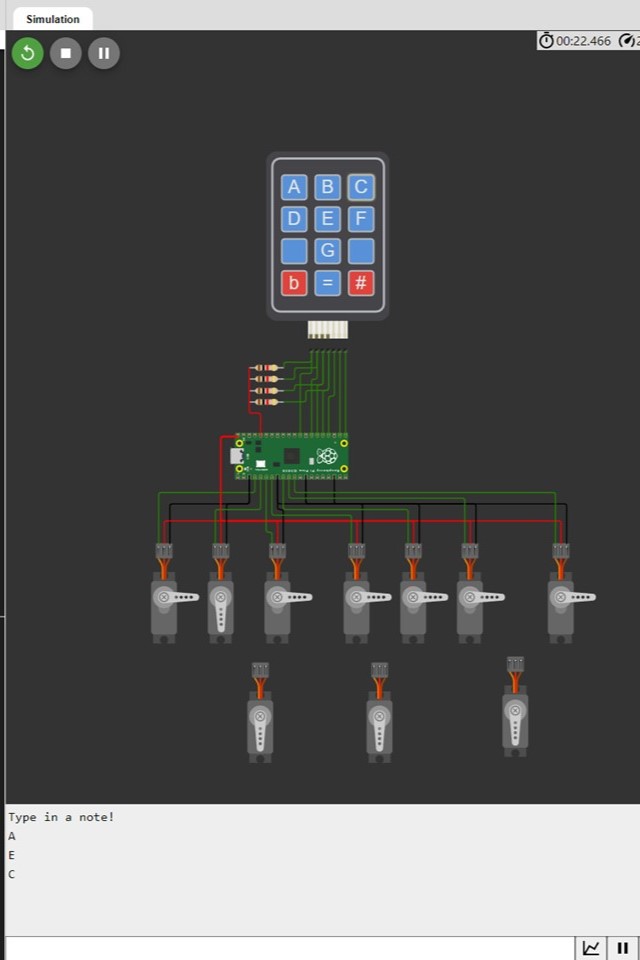
Incredible. Works like a charm. Now I can type out any note on the keypad (that is a natural note in the first register of the horn) and it will actuate the servos corresponding to the saxophone keys that are needed to play that note. Initially, I was going to try to add in the memory logic to enable notes that are in the upper register and accidentals; however, this structure adds complexity to the code that in reality has no practical application beyond this assignment. The final iteration of this code (for my final project) will function, in essence, the same as this initial pass of the software: a large map of all possible notes will be displayed to a user - including accidentals in both registers - so that notes can be quickly actuated on the horn. If I wanted to make this version of the code more similar to the final project, I could forego the 3X4 keypad for a larger on with all notes displayed; however, that feels a bit redundant for the purposes of this weekly assignment and I could introduce that complexity in future work.
Here is a link to the Saxophone Actuation Device (SAD) project on Wokwi.
Overall, this project is a complete success! The keypad actuates the proper saxophone keys via the servo, the case structure works well, and the code is simple enough to load on a RP2040 chip. I was looking forward to this week since I have very little prior experience with embedded programming and electronics, but thanks to the examples and the instruction from course staff I was able to acheive my desired goals. On to next week - 3D printing and scanning!
